Screen recording is a handy feature that comes in handy for a variety of tasks, including generating instructional. If a picture is worth a thousand words, screen recording in laptop is worth a lot more.
Not only that, but we’ll show you how to use In Video’s online editor to turn your screencasts into professional videos.
On Windows 10, how do you record your screen?
Game Bar, a built-in utility in Windows 10, allows you to record your screen. It was also made to record PC and Xbox game sessions, but it can also record other programmes and activities.
To begin, set your system to Game Mode:
Step 1: Select settings from the start menu.
2: Select Gaming from the Settings menu.
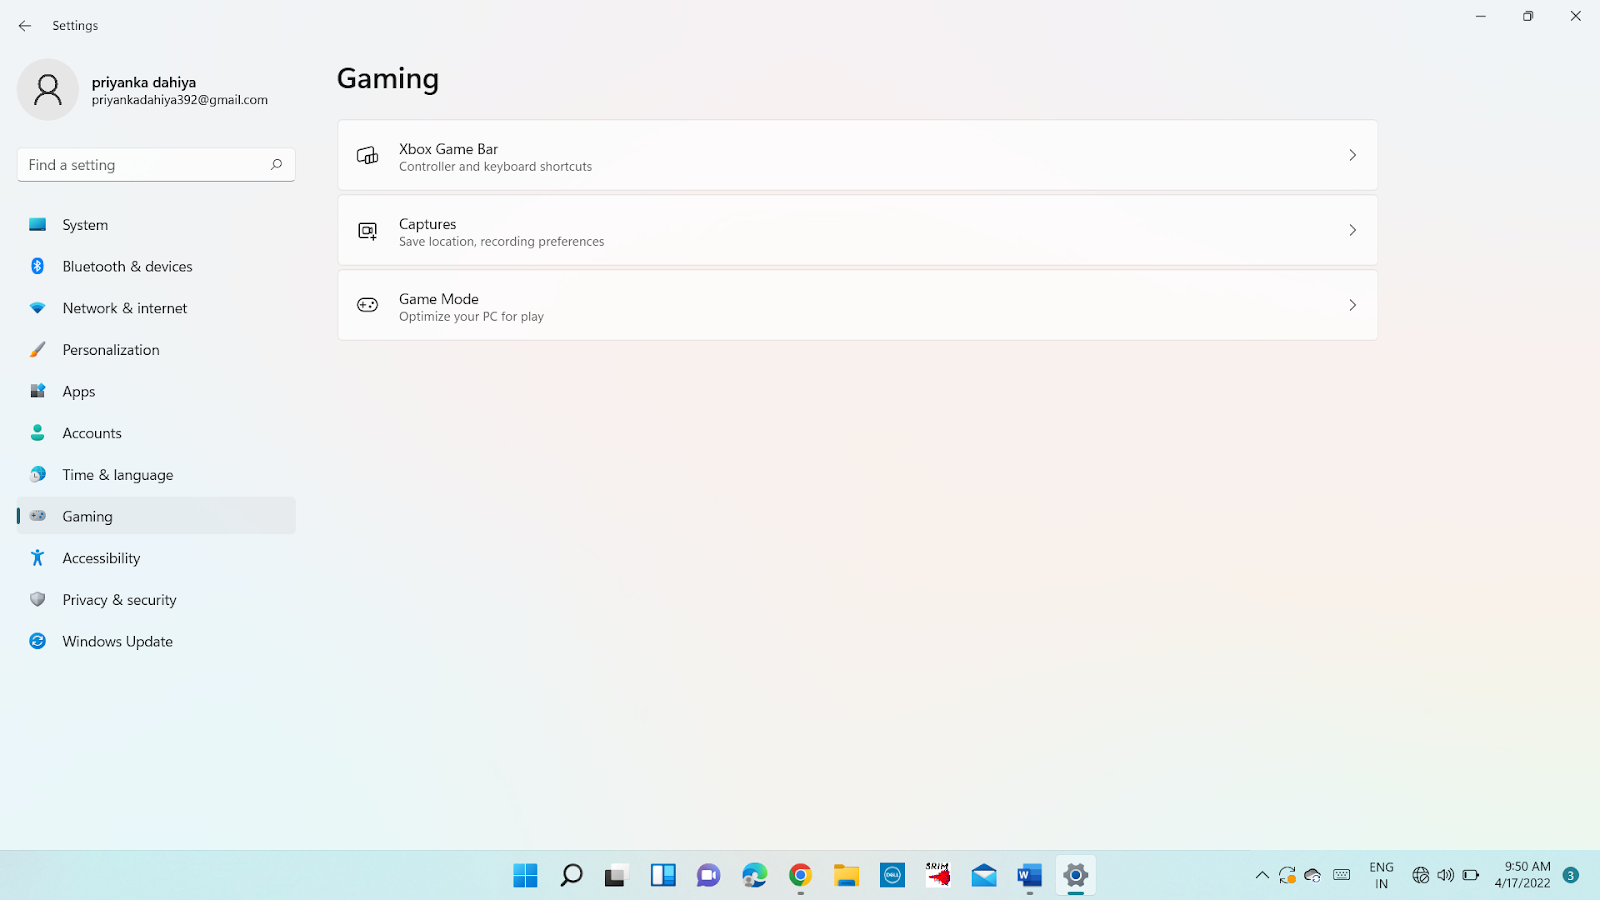
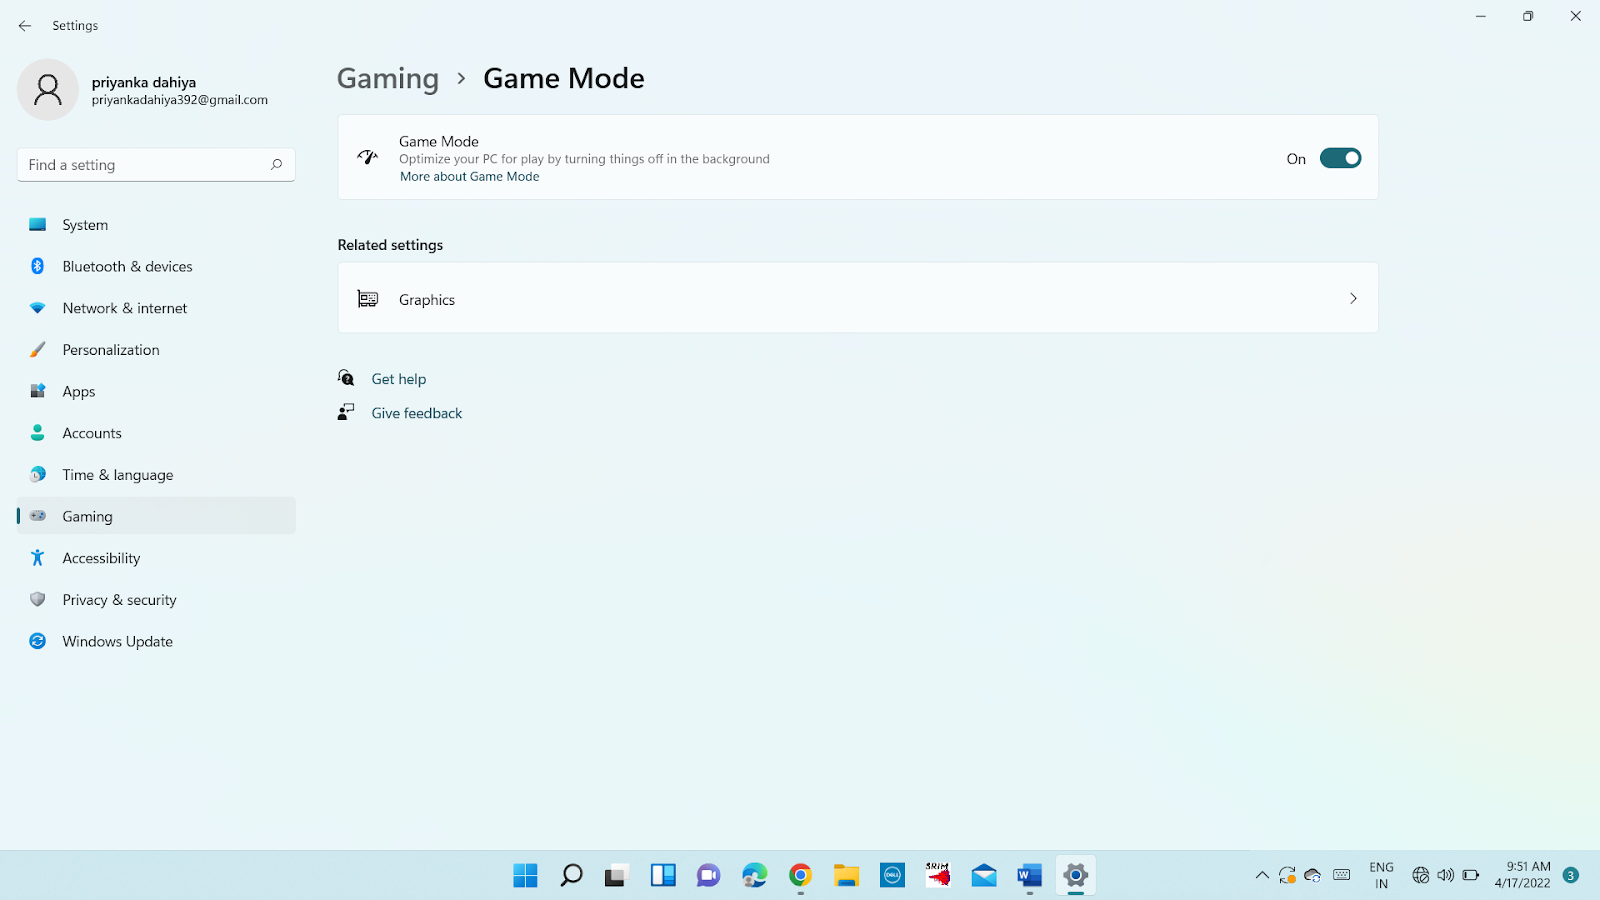
Step 3: enable the game mode
To check the most extreme span of how long a screen recording can also be, make a beeline for Game Bar’s settings. Click on the Start menu and hit Settings. Click on Gaming. Under Captures will be the choice for even Background Recording. Select from the most extreme recording time drop-down from 30 minutes to 4 hours.
The most effective method for screen recording on Windows 10_ Step 4
Presently you’re good to go to record your screen. Windows 10 Game Bar can uphold screen recording of each application in turn. This implies, you can’t change to recording another window or ALT + TAB your way after you’ve begun recording. Additionally note that you can’t record your Desktop or File Explorer or Maps.
With that, how about we get down to the means you can use to record your screen utilizing the Game Bar.
Utilizing the Game Bar during Screen Recording
Step 1: Launch the recording app. In Addition to it, Close all other windows and double-check that your recording isn’t contaminated by unwanted audio.
Step 2: Using your keyboard, press Windows + G. The Game Bar should appear now.
Also Read: Coolest Wearable tech gadgets
Step 3: To take a screenshot, open the ‘Capture’ box and click the Camera icon. Click the dot in the circle (or press Windows + Alt + R) to begin recording your screen.
Using the Game Bar to record a screen –
Step 4: When you start recording, you’ll see a capture status screen with a timer, recording controls, and a microphone. To record commentary, the mic is used to turn on and off external sounds. sometimes, even by default, all internal sounds are recorded.
Step 5: Press Windows + Alt + R again to end recording, or click the stop button.
Step 6: On the right side of the screen, a pop-up will appear that says “Game clip recorded.” The screen recording will also be saved in the ‘Captures’ folder in File Explorer if you click on the pop-up.
Screen Record on a Mac Laptop
Although Apple computers lack the Xbox Game Bar, they do feature two convenient and superior screen recording techniques.
- The Toolbar for Screenshots
- The QuickTime Player is a multimedia player.
MacOS Mojave and later include the Screenshot toolbar. QuickTime Player is compatible with all Mac OS versions.
Recording Your Screen Using the Screenshot Toolbar
With the Screenshot toolbar, you can capture the entire screen or just a portion of it.
- To bring up the Screenshot toolbar and a selection overlay on the screen, press Shift + Command + 5.
- Choose Record Full Screen to capture the entire desktop or Record Selected Portion to record a specific region. Drag the bounds of the selection box to designate a section of the screen to record before pressing the Record Selected Portion button. Drag the selection box from one of the four corners to another. Screenshot Toolbar’s Record Screen button has “Record Selected Portion” underlined.
Also Read: Format Word Document Professionally
3. To open a dropdown menu, choose Options. Set a different save location, record with the microphone turned on, and start recording after a pre-defined interval using the options. Options highlighted in the Toolbar
4. To start the screen recording, click Record. If you wish to stop the recording, press the Esc key.
5. To stop recording, use the Command + Control + Esc keyboard shortcut or the Stop button on the menu bar.
A thumbnail of the video shows up in the lower-right corner of the screen.
The following activities really rely on how you need to utilize the screen recording in laptop.
Activities really rely during screen recording
- Swipe the thumbnail to one side to save the screen recording in laptop.
- Click the thumbnail to open and play the recording. You can utilize the Trim button to manage the recording or select the Share button to share it.
- Drag the thumbnail to move the recording to some other archive or area (like a talk window or the Trash).
- Control-click the thumbnail for additional choices from the right-click menu.
Also Read: Apps for physical exercise
You have your recording and the screen catch. Presently, If you need to have an effect and put in any amount of work, you’d need to transform your screen-accounts into completely altered recordings with music and message. That is where an internet based video editorial manager like InVideo can prove to be useful. You can without much of a stretch make proficient quality recordings in minutes regardless of whether you’ve never altered a video.